

Introduction
Sushi is a beloved dish that blends simplicity, artistry, and fresh flavors. Many people assume it can only be made by skilled chefs, yet preparing it at home is easier than you might think. In fact, you just need a few basic ingredients, a bit of technique, and the right attitude to craft amazing rolls. Moreover, homemade sushi empowers you to choose exactly what you want inside each roll, whether it’s traditional tuna, crisp cucumber, or even spicy shrimp.
Because sushi relies on quality ingredients, it also encourages you to explore fresh foods and experiment with flavor combinations. You can discover which fillings you love, find the perfect balance of tangy rice and savory fish, and serve beautiful rolls that make a meal feel special. Despite common misconceptions, sushi does not need to be intimidating. Instead, think of it as a fun cooking project that brings people together.
Today, you will learn How to make sushi in 5 steps? This guide is designed for the curious home cook who wants to learn an approachable way to roll sushi. Along the way, we will go through everything from selecting your sushi supplies, preparing tasty fillings, and mastering the rolling technique. Yes, you can indeed make sushi in your own kitchen and impress your friends or family. Better yet, you control each ingredient, so you can ensure the freshest and healthiest options.
Before we dive into these five steps, it helps to know a bit about the essence of sushi. At its core, sushi is vinegared rice combined with seafood or vegetables. That’s why it’s essential to pay close attention to your rice and fillings. Properly prepared rice should be lightly sticky, allowing it to hold together when rolled. Meanwhile, your fillings should be sliced thinly and arranged in a neat row, so each bite has a harmonious ratio of flavors.
Furthermore, sushi is more than just a meal. It’s a culinary tradition that highlights quality. Every roll is a blend of color, taste, and texture. Thus, if you are ready to begin this savory adventure, continue reading for a complete, easy-to-follow guide. You will be delighted by how quickly you can produce eye-catching, delicious rolls that rival your favorite restaurant versions. All it takes is a short list of supplies and a willingness to try something new.
In the next sections, we’ll focus on the practical side. We’ll explore which basic supplies you need, show you how to cook and season sushi rice, and finally, demonstrate the rolling process. By following the five steps, you’ll build confidence in making sushi for yourself and others. Are you excited to start? Let’s roll right into it!
How to Make Sushi in 5 Steps?
Below, you will find an easy guide on preparing sushi at home. You will discover that with some simple tools and fresh ingredients, you can make rolls that are both healthy and flavorful. Furthermore, these five steps offer a clear way to plan and execute your sushi-making session. Soon, you’ll be adding your own creative spin on each roll.
Step 1: Gather Your Essentials for Homemade Sushi in Five Steps
Before you dive into assembling rolls, you need to gather the tools and ingredients that set you up for success. Choosing the right sushi rice and high-quality fillings lays the groundwork for a satisfying result.
- Bamboo Mat (Makisu)
A bamboo rolling mat is the core tool that helps shape your sushi roll. You can find one at most grocery stores or online retailers. Having one makes rolling simpler, as it provides structure and creates even pressure. Also, place a sheet of plastic wrap over the mat to keep it clean. - Sushi Rice
Sushi rice is short-grain rice specially chosen for its sticky texture. Look for packages labeled “sushi rice” or “short-grain Japanese rice.” This variety will hold its shape when rolled, and it has the right amount of starch. Try to avoid long-grain rice, as it will not achieve the correct consistency. - Rice Vinegar, Sugar, and Salt
Mixing these simple ingredients with cooked rice creates the hallmark vinegared flavor of sushi. Your ratio might vary, yet a basic combination is around 1/4 cup rice vinegar, 1 tablespoon sugar, and a pinch of salt per 1 cup of uncooked rice. This blend brings a pleasant tang that complements the fillings. - Nori Sheets
Nori is a type of dried seaweed that comes in flat, square sheets. It acts as the wrapper for many sushi rolls. Make sure to purchase the full-size sheets, because they are easier to handle. Nori has a mild, savory taste that pairs well with the rice and other ingredients. - Fillings
Fillings vary according to personal taste, but popular options include fresh fish (like tuna or salmon), cooked seafood (like crab or shrimp), vegetables (such as cucumber, avocado, or carrot), and pickled items (like pickled radish). When selecting raw fish, make sure it is labeled sushi-grade or sashimi-grade to ensure safety. - Sharp Knife
A sharp knife is essential for slicing fillings and cutting your final rolls. Dull knives can damage delicate ingredients and tear the nori. Pick a thin-bladed knife that glides cleanly through your roll.
By gathering these items, you lay a strong foundation for a simple five-step sushi adventure. Yet, don’t forget smaller details like a small dish of water for wetting your hands, as it stops the rice from sticking to your skin. In addition, keep your workspace tidy and organized, so you can roll with ease.
Step 2: Prepare the Sushi Rice for a Five-Step Sushi-Making Guide
Once you have your essential tools and ingredients, it’s time to cook and season the rice. Proper rice is key to delicious sushi. It should be slightly sticky but not too wet. You also want balanced flavor from the vinegar mixture. Below is how you can achieve perfect sushi rice.
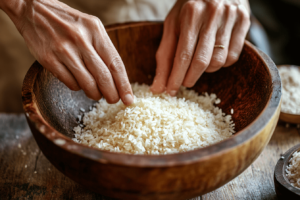
- Rinse the Rice
Measure your desired amount of sushi rice and place it in a strainer. Then, rinse under cool water until the water runs clear. This step removes excess starch, which can make the rice too gummy. Rinse carefully, but do not soak for too long. - Cook the Rice
Use a rice cooker or follow stovetop directions on your sushi rice package. Generally, you combine 1 cup of sushi rice with about 1 1/4 cups of water. Then you bring it to a boil, reduce to low heat, and cover the pot. Let the rice simmer until all water is absorbed, which usually takes 15 to 20 minutes. After that, remove it from heat and let it sit for about 10 minutes. - Make the Vinegar Mixture
In a small bowl, blend rice vinegar, sugar, and salt. Gently warm this mixture to help the sugar and salt dissolve. You can do this in a microwave or on a stovetop over low heat. Stir until the sugar melts. Adjust the flavor to your preference by adding more sugar or salt if desired. - Season the Rice
Transfer the cooked rice to a large bowl or a traditional wooden tub called a hangiri (if you have one). Slowly drizzle the vinegar mixture over the rice while gently folding it in with a wooden spoon. Use a cutting motion rather than stirring in circles. This method helps each grain get coated without squashing the rice. - Cool the Rice
As you fold in the vinegar mixture, fan the rice or allow air to circulate. This process cools the rice and gives it a glossy look. Try not to leave your vinegared rice out for too long, though, especially if you plan to use raw seafood. Ideally, it should be used right away or kept covered with a damp cloth.
Now that your rice is seasoned and ready, you are one step closer to rolling perfect sushi. Good rice texture is crucial. You want it sticky enough to keep the roll intact but not so moist that it turns mushy. By following these suggestions, you’ll have a sweet and tangy rice base.
Step 3: Slice and Arrange Fillings for Creating Sushi at Home in Five Steps
With your rice prepared, it’s time to deal with the fillings. Having everything sliced and lined up neatly will make rolling effortless. In addition, it is important that each ingredient fits inside the roll in a balanced manner.
- Prepare Fish or Seafood (If Using)
If you are using raw fish, such as tuna or salmon, ensure you buy sushi-grade cuts. Slice them into thin strips or small cubes. If you prefer cooked seafood, like shrimp, boil or steam them until fully cooked, then peel and devein. You can also use imitation crab sticks (surimi) for a classic California roll. - Chop Vegetables
Thin slices work best for vegetables because they roll more easily. For instance, cut cucumbers into matchstick pieces, remove seeds if you like, and do the same for carrots. Avocado can be sliced lengthwise to keep consistent shapes. If you’re using pickled radish or other pickled items, slice them into thin strips as well. - Arrange Filling Options
Organize your ingredients into tidy piles or in a row near your workspace. This makes it simple to grab what you need. Doing this step now is helpful because you won’t have to pause mid-roll to slice more items. Plus, you can mix and match your fillings, adding unique twists to each roll. - Keep Food Safety in Mind
Always keep raw fish chilled until ready to use, especially if your kitchen is warm. Do not let fish sit out for extended periods. Also, clean and sanitize your cutting board and knife after handling raw fish. This step reduces the risk of cross-contamination, which is crucial for safe sushi.
By properly slicing and arranging your fillings, you ensure a stress-free rolling process. In a short while, you will be layering the prepared rice and these fillings into artful rolls. This planning step is vital for making the entire process run smoothly. Moreover, it helps you visualize what your final creation will look like.
Step 4: Roll the Sushi to Master Sushi Preparation in 5 Steps
This step is where the fun really begins. Rolling sushi may seem tricky, but you will quickly find a rhythm once you try it. Moreover, you will see that using a bamboo mat simplifies the process, giving you even pressure for tight, neat rolls.

- Place the Nori
Lay a sheet of nori on top of the plastic-wrapped bamboo mat. The shiny side of the nori should face down. Position it so that the lines on the nori sheets (from their natural texture) run horizontally toward you. - Spread the Rice
Moisten your hands in a small bowl of water. This stops the rice from sticking. Pick up about a handful of sushi rice and gently spread it over the nori. Leave an inch of space at the top edge of the nori without rice. This gap is where the roll will seal. The rice layer should be even, but do not press it down too firmly. - Add Fillings
Place a strip of fish, seafood, or vegetables in the middle of the rice, running horizontally across. Use a moderate amount of filling. Using too much can make the roll difficult to seal. You can blend fillings, like a combination of salmon, avocado, and cucumber, or keep it simple with just one ingredient. - Begin Rolling
Lift the bottom edge of the bamboo mat (the side closest to you) and fold it up and over the filling. Apply slight pressure to shape the roll. As you continue rolling, gently pull back the mat so it doesn’t get wrapped into the sushi. Keep rolling forward until you reach the top edge of the nori. - Seal the Roll
Dip your finger in water and moisten that one-inch strip of nori at the top. This helps seal the roll. Roll the sushi the rest of the way, pressing gently along the seam. Now you have a firm cylinder of sushi. Adjust the shape if needed, pressing lightly on each side with the mat.
By practicing this method a few times, you’ll gain confidence and speed. Each roll becomes a chance to try new fillings or variations. If you are making many rolls, wipe your knife between cuts, and keep re-wetting your hands to prevent rice from sticking. You are nearly done—just one more step remains.
Step 5: Slice and Serve Sushi Rolls in Five Steps
Now that your sushi rolls are formed, you need to slice and present them in a visually appealing way. That final touch makes all the difference, turning each roll into a shareable feast. In addition, this moment allows you to add subtle garnishes or flavor boosters.

- Prepare Your Knife
Run your sharp knife under cold water or wipe it with a damp towel. This removes any excess rice and helps the blade cut neatly through the roll. Repeat as needed between slices to maintain clean edges. - Cut the Roll
Position your sushi roll on a cutting board. Use a swift, gentle sawing motion to make slices about one inch thick. Typically, a roll yields six to eight pieces, depending on your preferred portion size. Avoid pressing down too hard, or the fillings might shift. - Arrange on a Plate
Place your sliced pieces on a platter or sushi plate with the fillings facing up. It showcases the colorful layers. You can garnish with sesame seeds, pickled ginger, or a light drizzle of spicy mayonnaise. Doing so adds more flavor and visual appeal. - Offer Condiments
Serve your sushi with small dishes of soy sauce and wasabi paste. People can then dip the pieces or add extra spice to each bite. Also, pickled ginger (gari) helps cleanse the palate between different rolls. - Enjoy Immediately
Sushi tastes best when it’s fresh. Encourage your guests—or yourself—to eat the rolls soon after they are cut. The rice’s texture and flavor shine most in these moments. Moreover, raw fish should not be left out too long for safety reasons.
With that final cut, you have successfully learned How to make sushi in 5 steps? You can now experiment with various fillings, sauces, and presentations. Each attempt will help you refine your technique, and soon, you’ll be rolling sushi with ease. Keep in mind, if something goes awry, it’s fine. Even imperfect rolls can taste amazing.
Additional Tips for Sushi Success
While the five-step process covers the essentials, the following extra pointers will make your sushi-making experience even better. These tips address common pitfalls and offer creative ways to personalize your rolls.
- Use the Freshest Ingredients Possible
Sushi depends on freshness. Fish should have a vibrant color and a pleasant smell. Likewise, vegetables should be crisp. By selecting top-quality produce and fish, you ensure superior flavor. - Experiment with Sauces
Besides soy sauce, you can experiment with spicy mayonnaise, teriyaki glaze, or even a tangy ponzu sauce. Lightly drizzle these sauces on top or inside the roll. This approach elevates taste and adds visual flair. - Play with Textures
Sushi is delightful when it balances soft rice, tender fish, and crunchy vegetables. Including cucumber, tempura flakes, or fried onions introduces a surprise crunch. Or, you can top your roll with thin slices of fish for an elegant look. - Vary the Presentation
Aside from the typical roll, you can create inside-out rolls (where rice is on the outside) or even nigiri (where a slice of fish sits atop a small mound of rice). These forms are fun to try, and they allow you to showcase the fish differently. - Serve with Confidence
Sushi is a social food that brings people together. Prepare some extra wasabi, pour some green tea, and invite friends to help roll. This experience can be a mini-party with interactive cooking and shared enjoyment.
Finally, remember that mistakes are part of learning. If you end up with a messy roll, slice it into bite-size chunks and label it a “rustic sushi.” It will still taste fantastic. Over time, your skills will improve, and you’ll feel proud of the flavor and art you create. Enjoy the process, stay patient, and keep exploring new ways to make your sushi shine.
Frequently Asked Questions
Below are concise answers to common questions about rolling and preparing sushi at home.
What are the steps in rolling sushi?
You first place a sheet of nori on a bamboo mat, spread the rice on the nori, add your chosen fillings, roll it tightly using the mat, and then seal and slice.
How is sushi prepared?
Sushi is prepared by cooking short-grain rice, seasoning it with a vinegar mixture, and assembling it with fish or vegetables on a sheet of nori. The roll is then sliced into bite-size pieces.
What are 5 ingredients in sushi?
Five popular ingredients are sushi rice, nori sheets, raw fish or cooked seafood, avocado, and cucumber. Variations often add carrots, pickled radish, or cream cheese.
How to make sushi step by step?
Gather the right tools, cook and season the rice, slice and arrange fillings, roll using a bamboo mat, and slice each roll into neat portions.
Conclusion
By following these five simple steps, you can master How to make sushi in 5 steps? and enjoy restaurant-quality results right from your own kitchen. Preparing the rice correctly, slicing fresh fillings, and rolling with care are the main keys to success. Moreover, you have the freedom to explore new flavor combinations and garnish your rolls creatively. So, gather your tools, pick your favorite ingredients, and start rolling. Sushi-making is an enjoyable experience that lets you share fresh and delicious bites with your friends and family.